
Markup AI for Contentful — Integration Guide
Markup AI for Contentful — Integration Guide
Use Markup AI inside Contentful to check and score the text fields on an entry as you author. The integration runs as a Contentful app — open an entry, click the Markup AI button on a configured field, and review issues from a side-by-side dialog without leaving the editor.
What you need
- A Contentful space with the Markup AI app installed (Contentful Marketplace listing).
- A Markup AI account, signed in via Google or Microsoft SSO from inside the app.
- Permission in Contentful to edit the content type and to use installed apps on its fields.
Which agents are supported
- Style Agent
What Markup AI does for you in Contentful
- Check & score: Run a check on a single field and get a Content Risk banner (High / Medium / Low Risk) plus a count of issues found.
- Targeted to the field: Each scan is scoped to the field you launched it from — short summary fields, long markdown bodies, and Rich Text bodies are all supported.
- Severity filters: Filter the issues list by High, Medium, or Low severity to triage what matters first.
- Apply a suggestion: Click a suggested replacement to apply it directly to the preview. When the same issue appears multiple times, apply all occurrences in one click.
- Save back to the field: Accept the applied fixes to write them back to the entry, or close without changes — your original content is untouched until you save.
- Workflow ID: Copy the workflow ID from the dialog footer to share a specific check run with Markup AI support.
Installing the Markup AI app
Markup AI is available in the Contentful Marketplace.
- In Contentful, open Apps → Marketplace.
- Search for Markup AI and select the listing.
- Click Install and choose the space and environment where you want the app available.
- On the Contentful permission prompt, click Authorize Access to let the app read and write entries on your behalf.
Once installed, the app appears under Apps → Installed apps and is ready to be assigned to your content types.
Assigning Markup AI to your content types
The Markup AI button only appears on fields you opt in. Configure this from the app’s Configure screen:
- Go to Apps → Installed apps and click Configure on Markup AI.
- Under Assign to Content Types, check each text field you want enabled. Supported field types are Symbol (short text), Text (long text), and Rich Text.
- Optionally pick a Default style guide for the content type. The default applies to every enabled field of that content type; authors can change the style guide per check from the Agent settings panel.
- Click Save in the top‑right.
Authors will see a Markup AI button on every enabled field next time they open an entry.
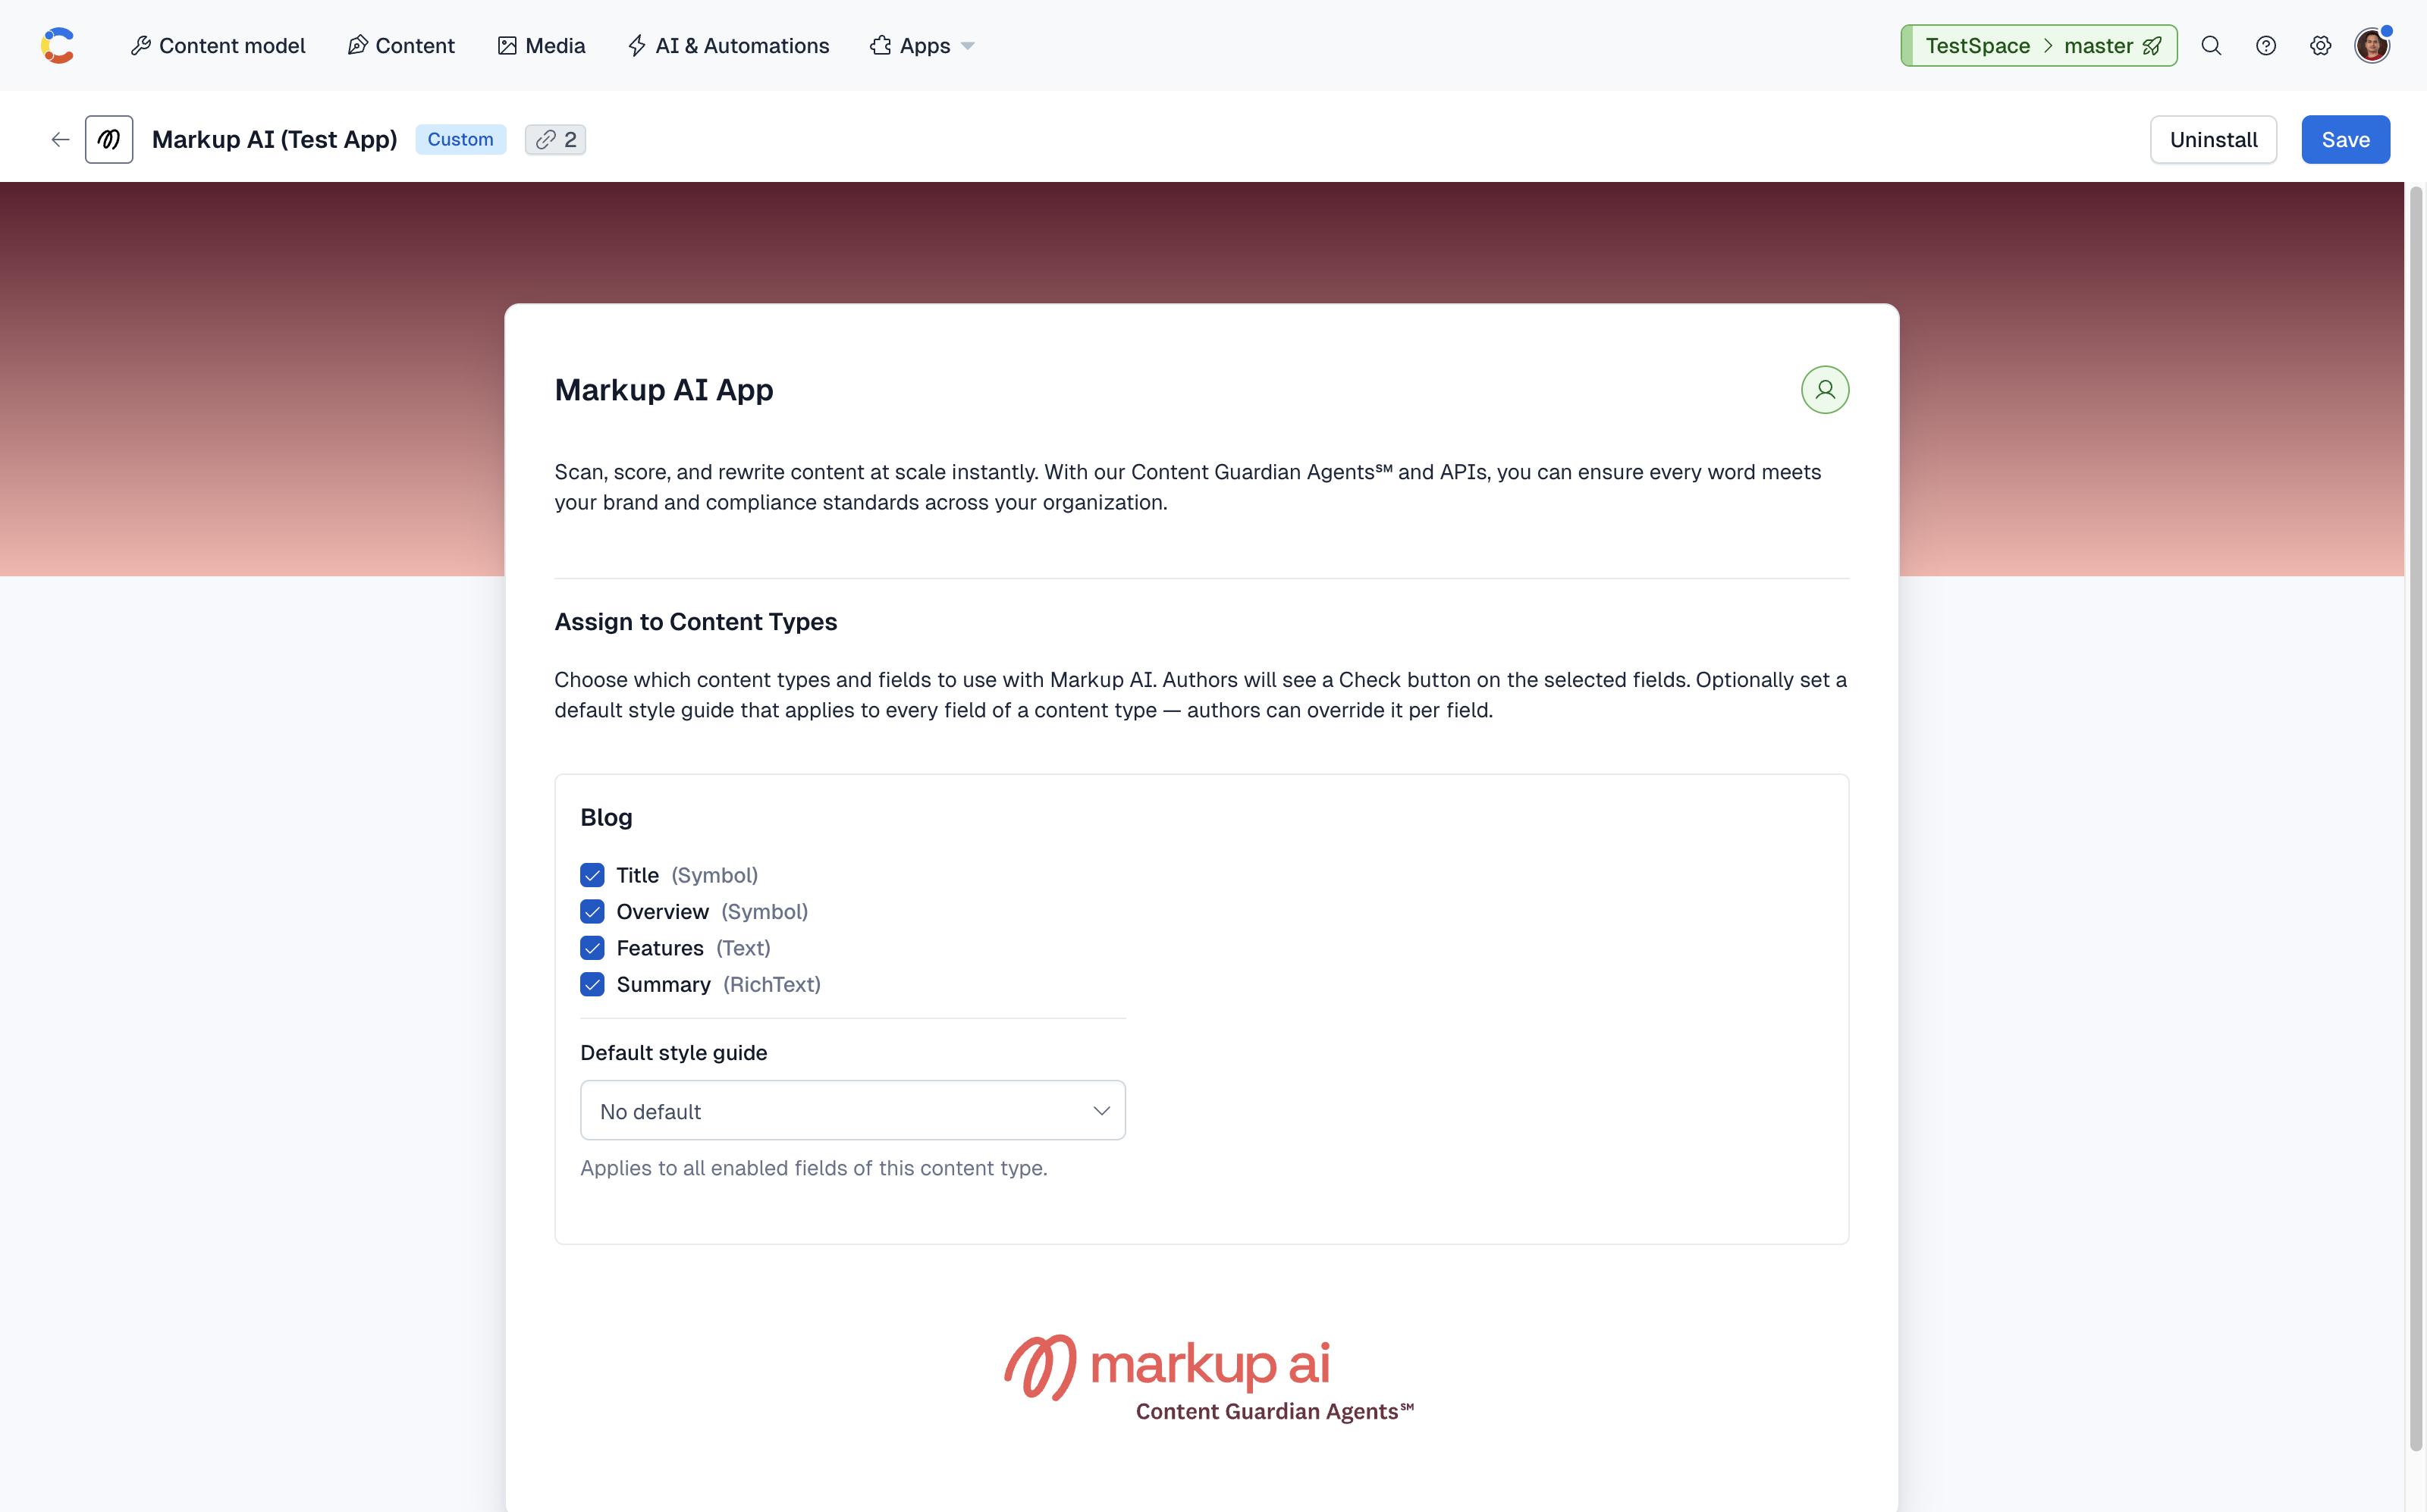
The default style guide is a starting point, not a lock. Authors can switch the Style Guide for a specific check from the Agent settings panel inside the dialog.
Launching Markup AI on an entry
- Open an entry that uses a content type you assigned Markup AI to.
- Each enabled field now has a small Markup AI button above the editor. Click it on the field you want to check.
- If this is your first time using the app in this session, sign in to Markup AI when prompted (Google or Microsoft SSO).
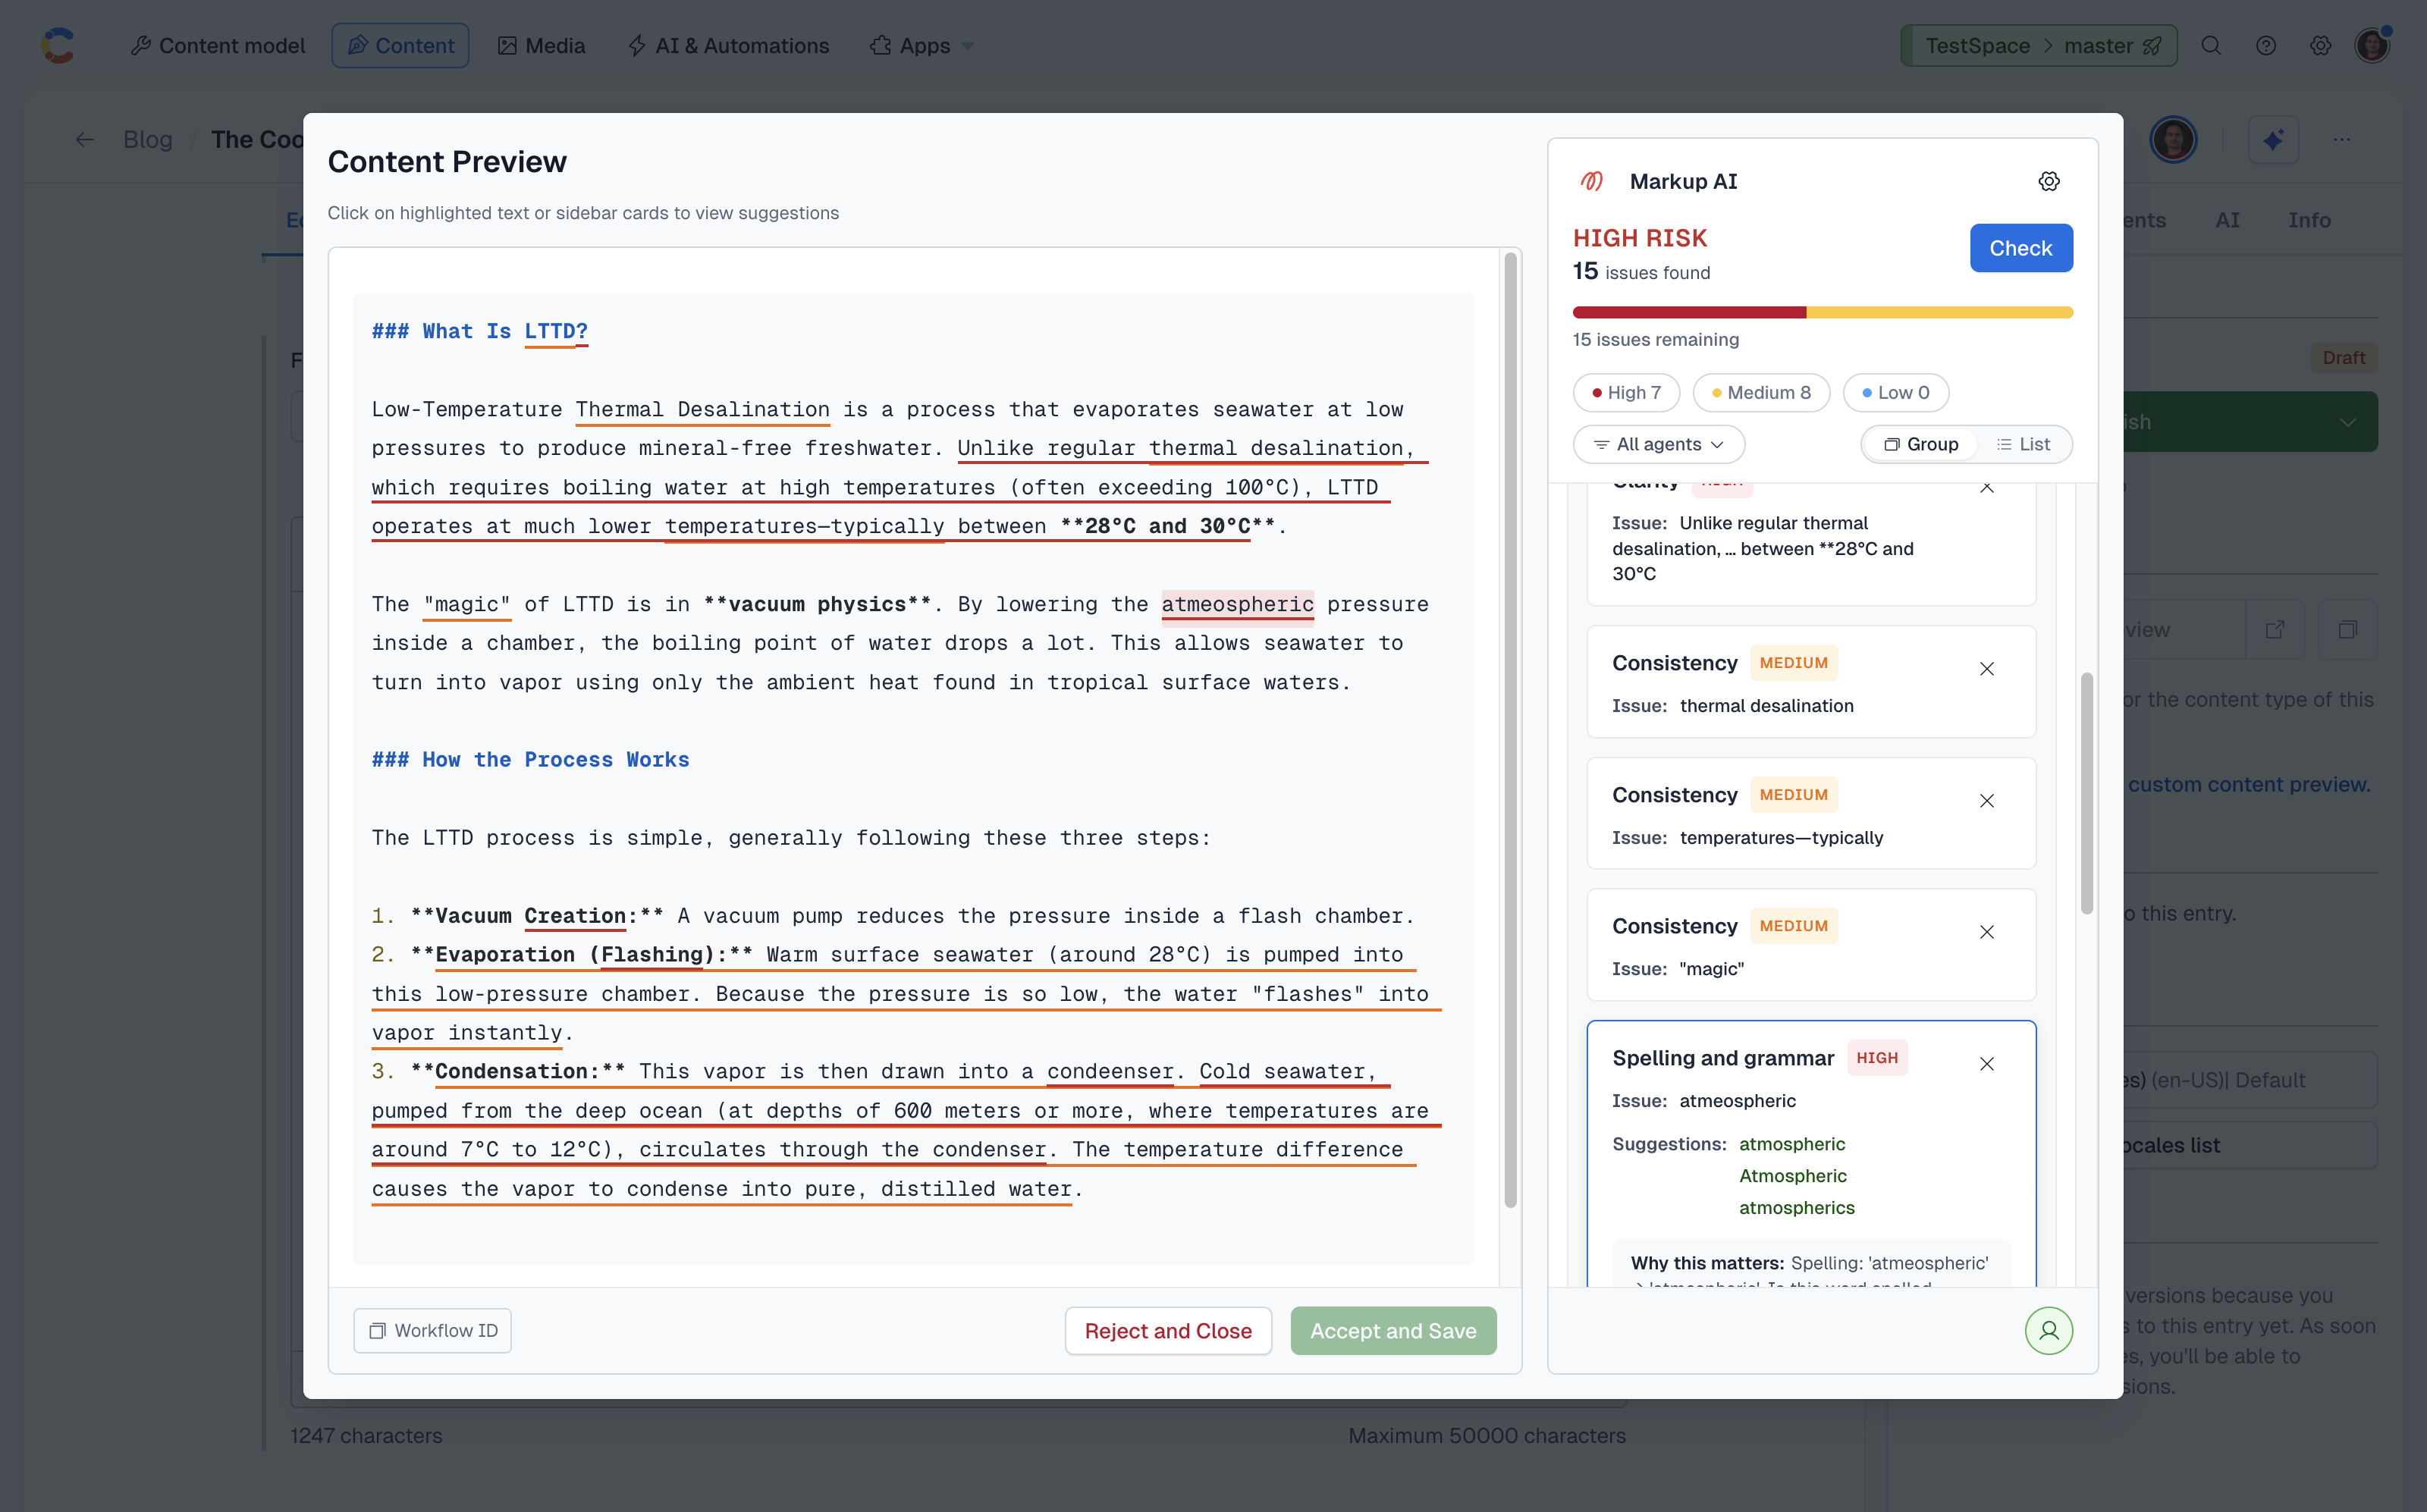
- The Markup AI dialog opens over the editor. The left side shows the field content; the right side is the Markup AI sidebar.
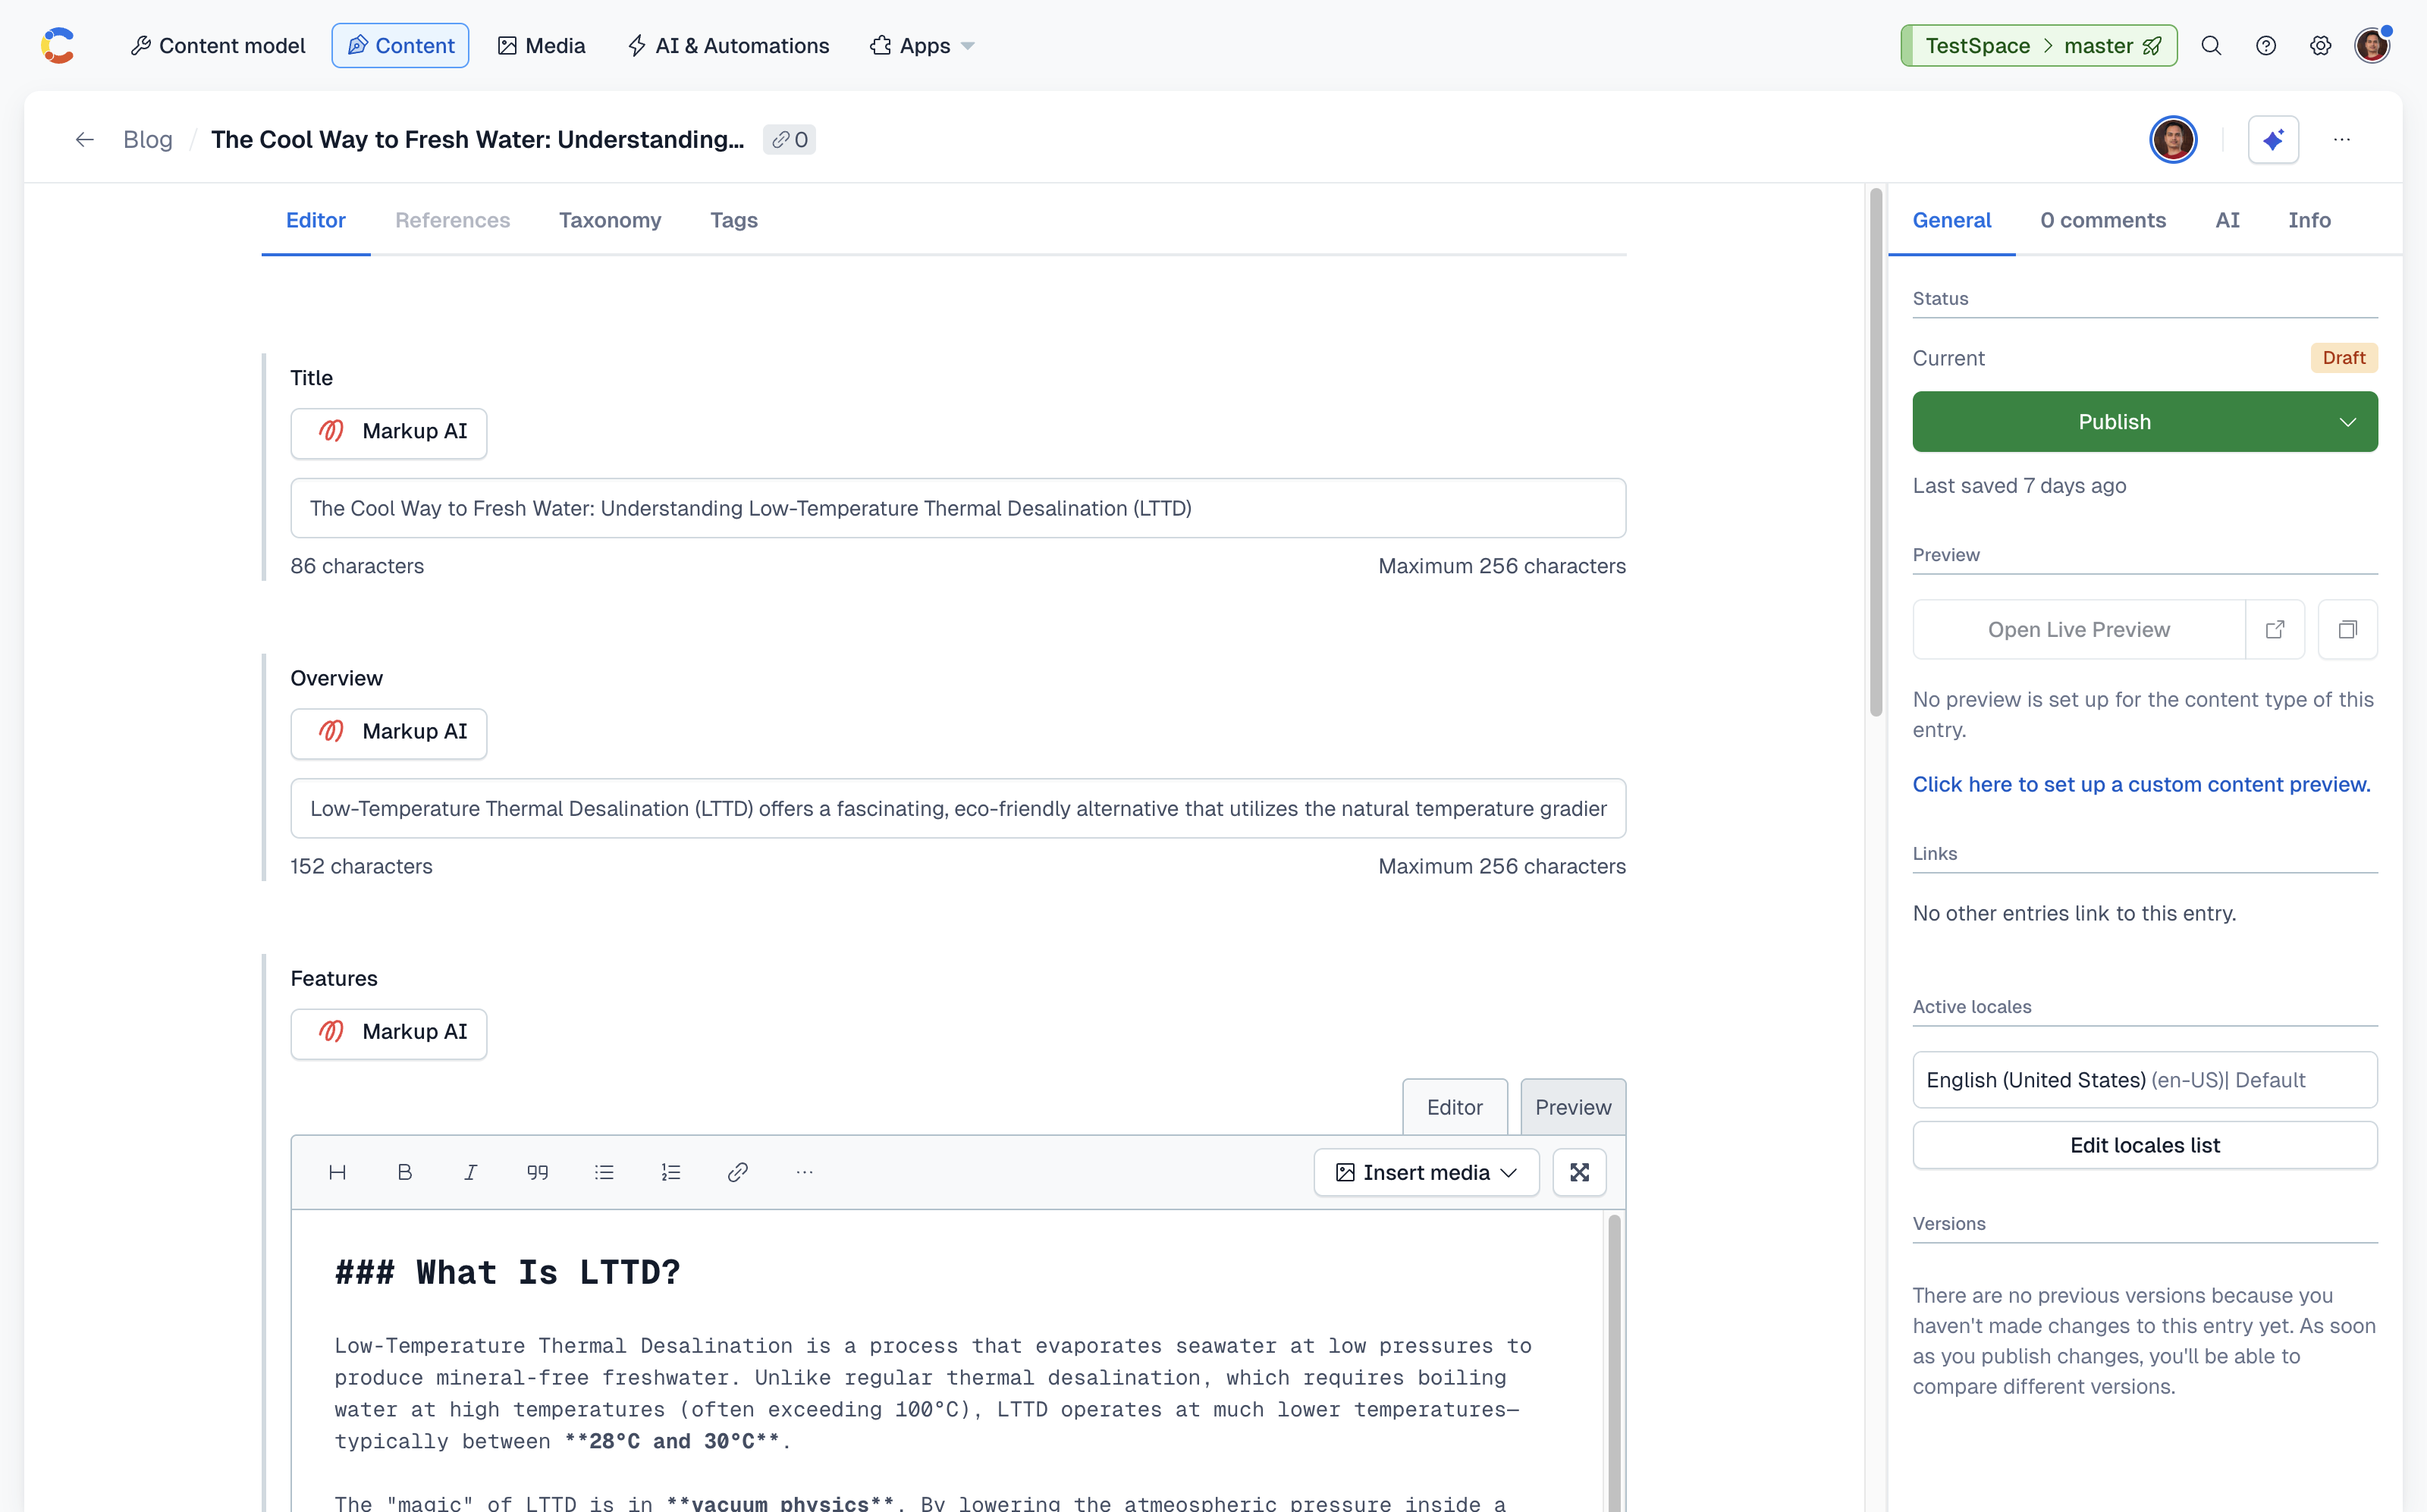
Configure your check
Before you run your first check on a field, open the Agent settings panel from the gear icon at the top of the sidebar to confirm the agents and style guide for this run.
- Style Agent: Toggle the Style Agent on to run style and brand checks against your content. Style Agent is the runnable agent today.
- Style Guide: Pick the style guide for this scan from the dropdown. The default is the one configured for the content type on the Configure screen — switch it here to run against a different guide for this check.
Settings persist across fields and entries for the current session, so you usually configure them once and move on.
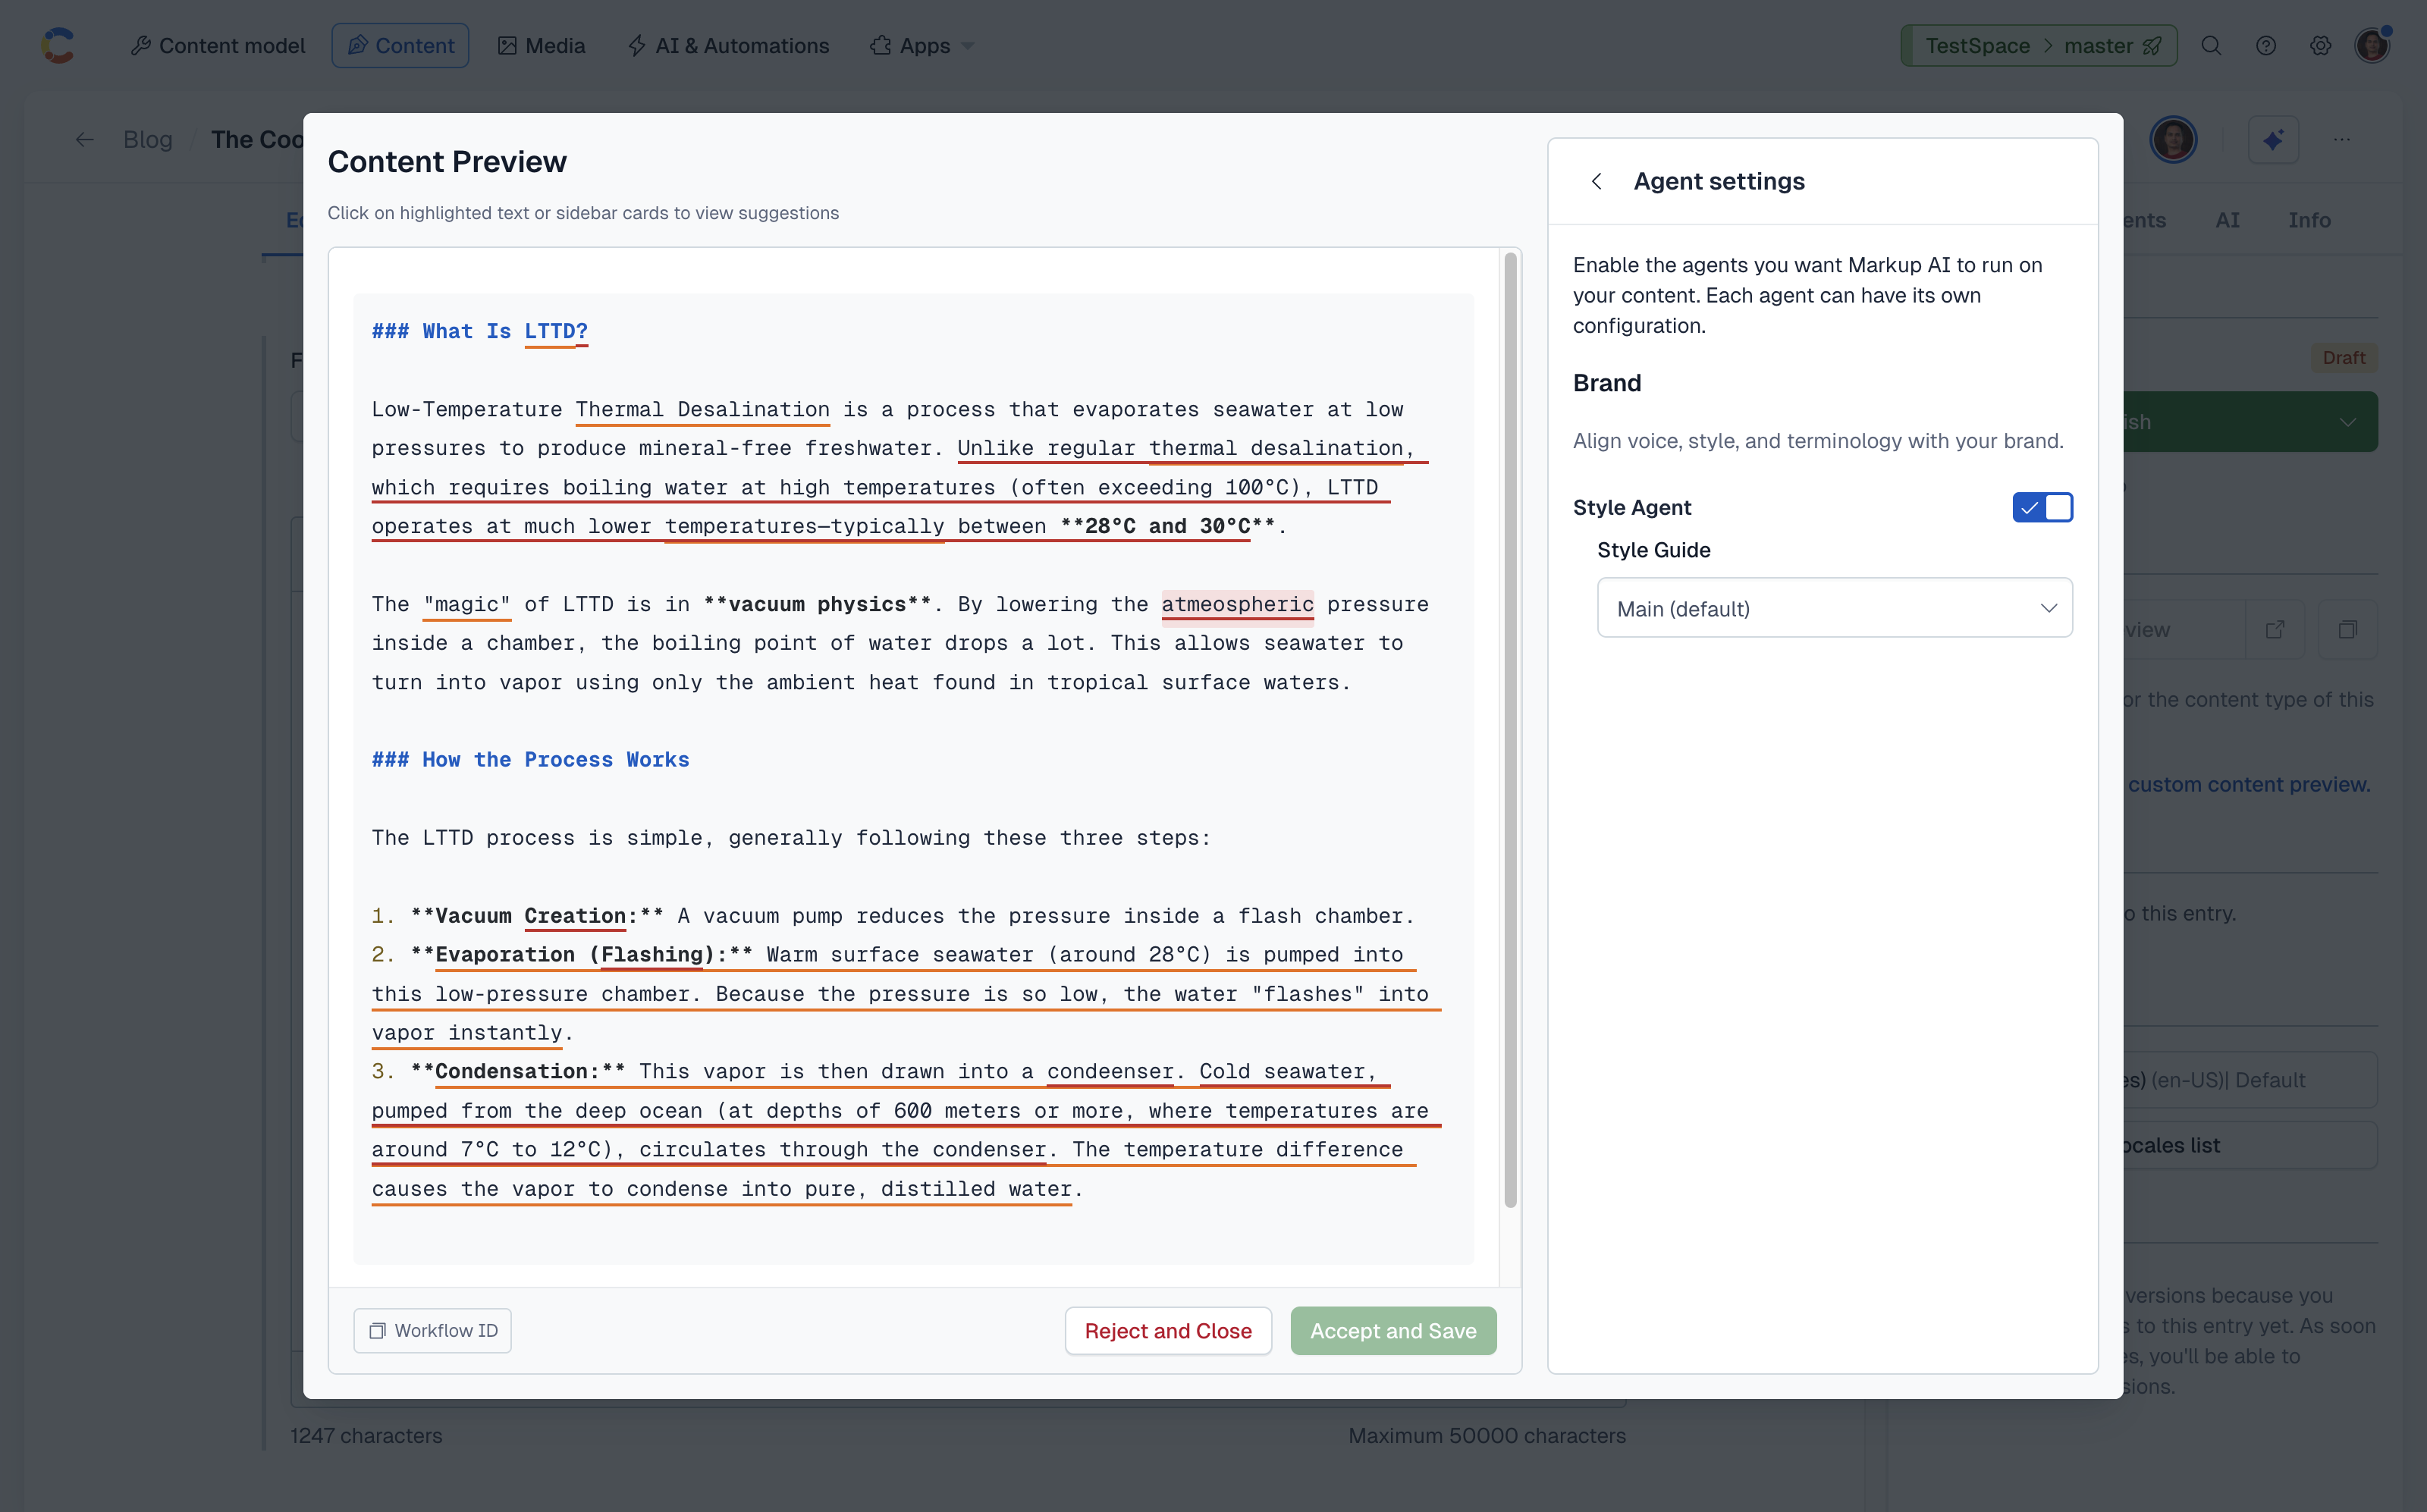
Running a check
- With the dialog open, click Check in the top‑right of the sidebar. Markup AI runs against the field’s current content and streams results back to the sidebar.
- The sidebar header updates with:
- A Content Risk banner — High Risk, Medium Risk, Low Risk, or All Clear.
- A score bar with the issue count (for example, 15 issues found).
- A severity breakdown as filter pills: High, Medium, Low.
- The content on the left shows the same text with underlines on flagged terms. Click an underline (or a card on the right) to focus that issue.
- Re‑run Check at any time to refresh the score after editing the preview.
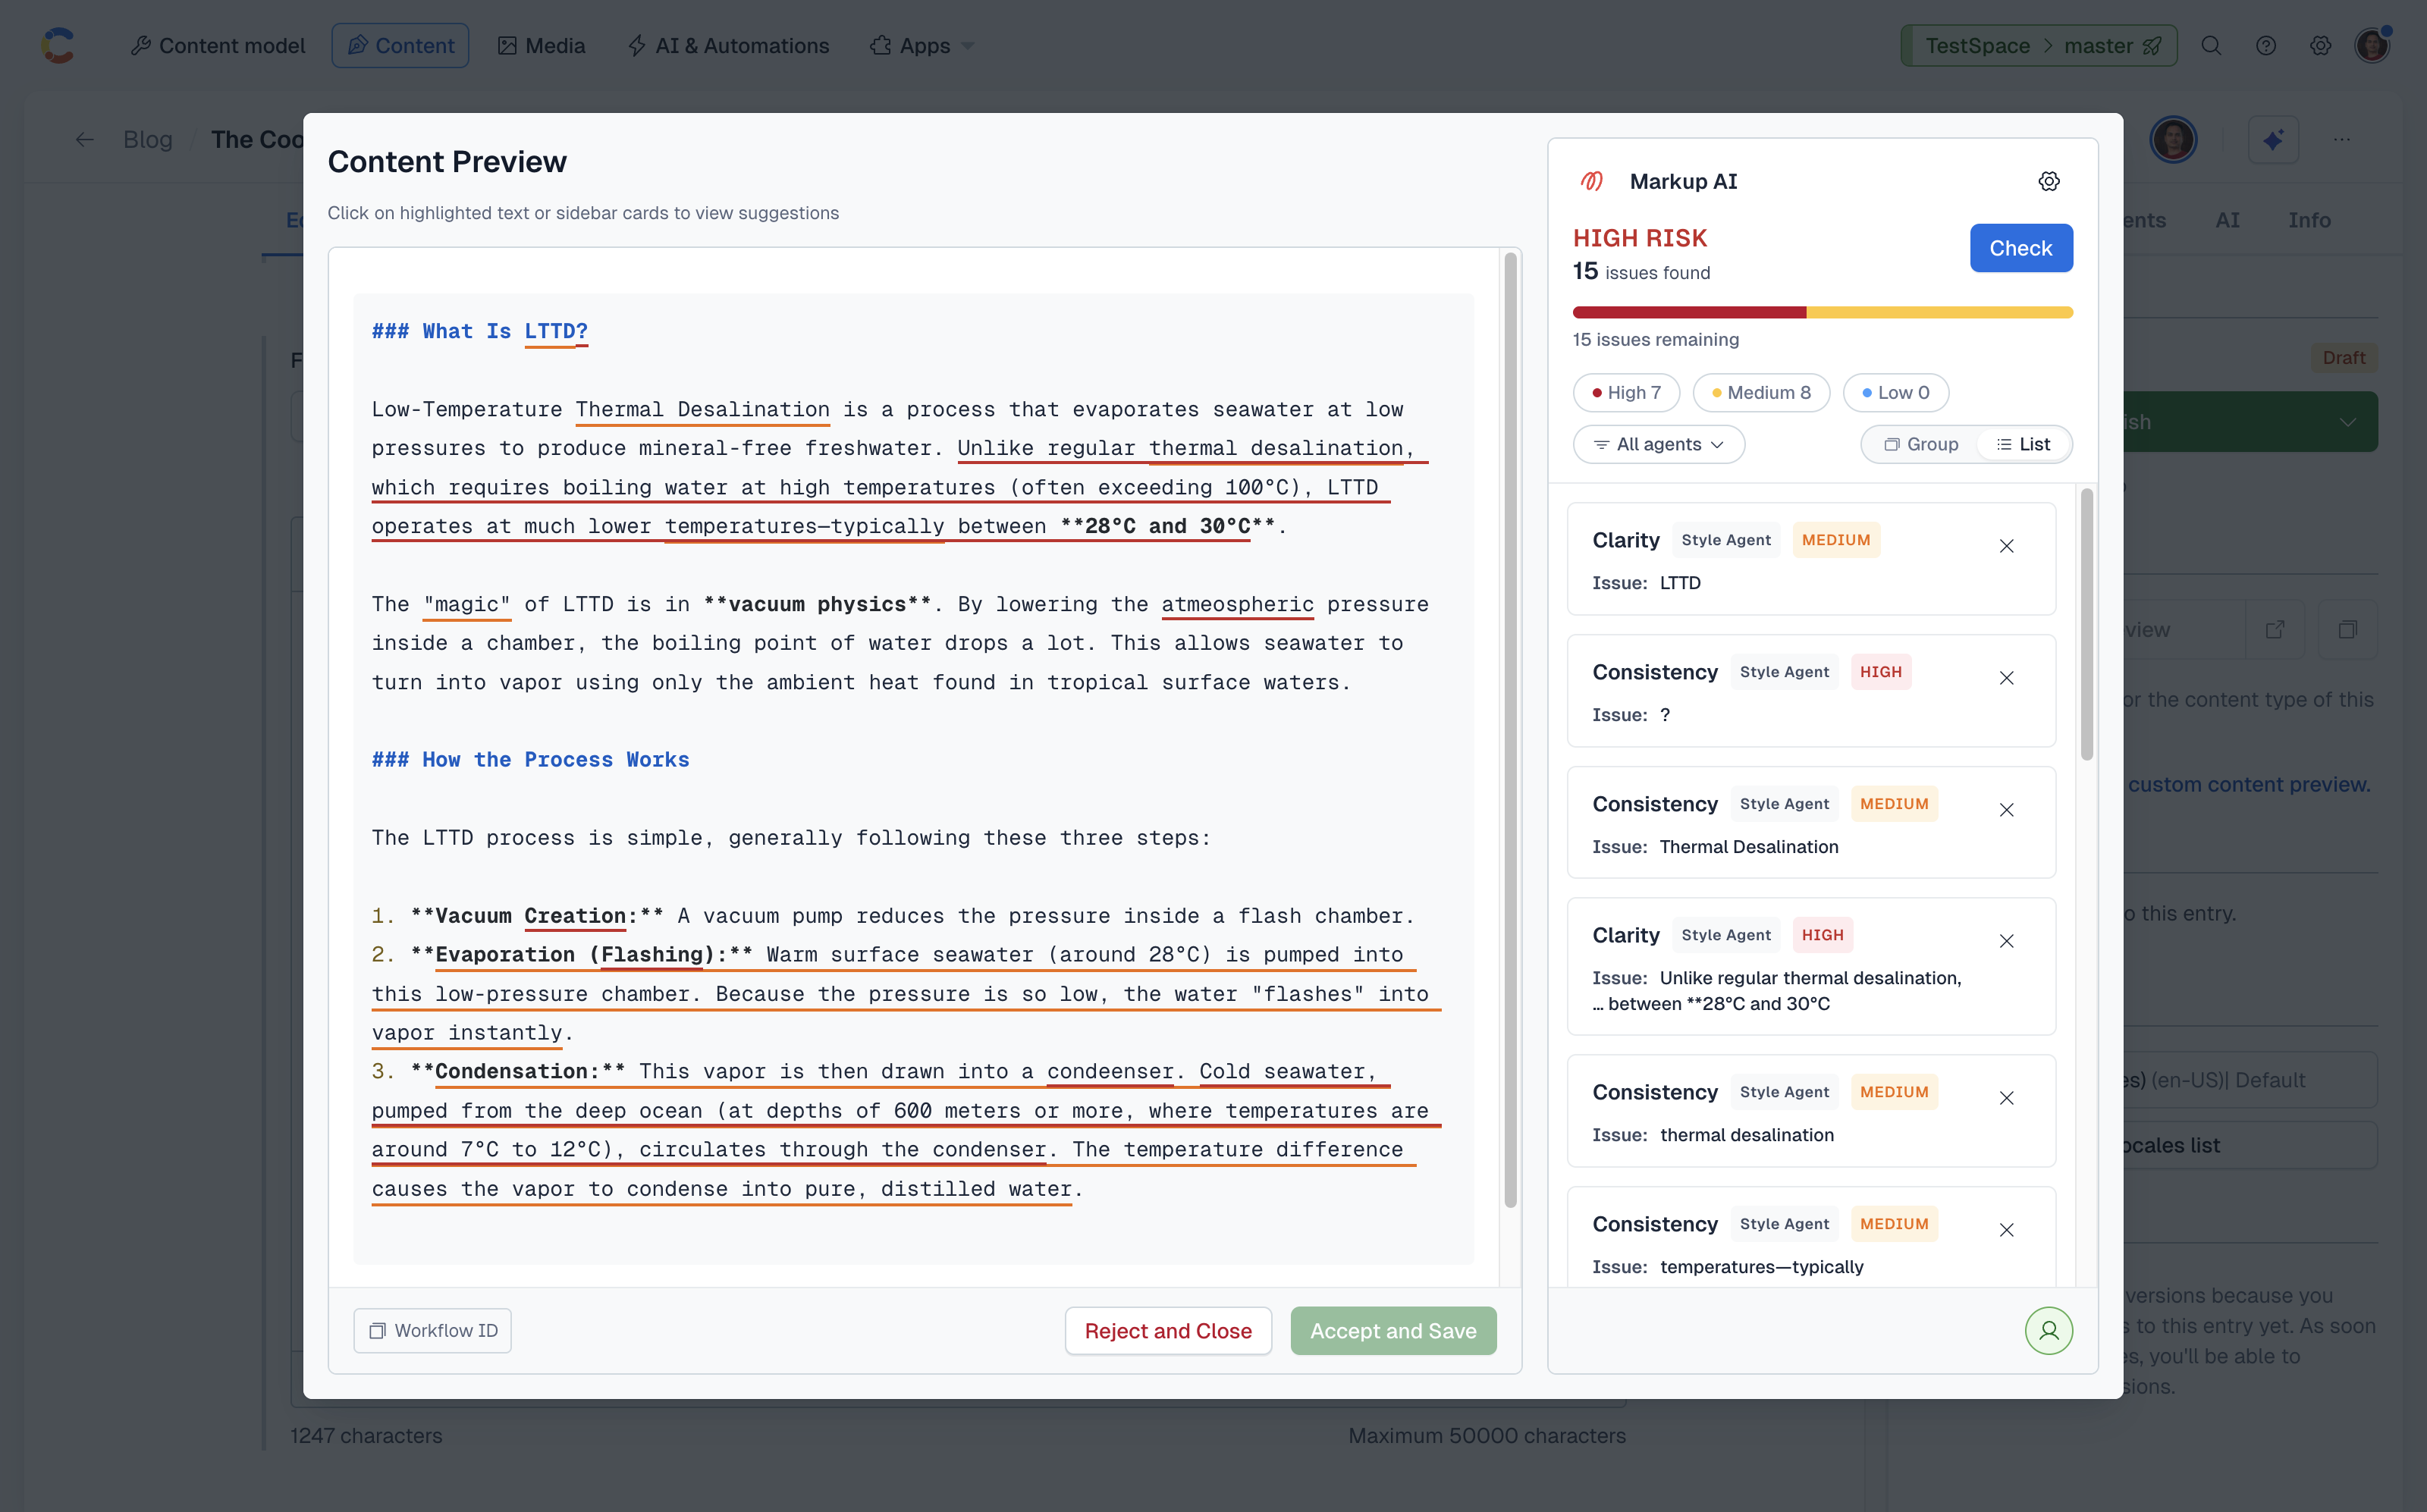
Reviewing and resolving issues
Use the controls at the top of the list to triage:
- Severity pills — Click High, Medium, or Low to scope the list to one severity level. Counts update as you apply or dismiss issues.
- All agents — Open the filter to scope the list to a specific agent or category.
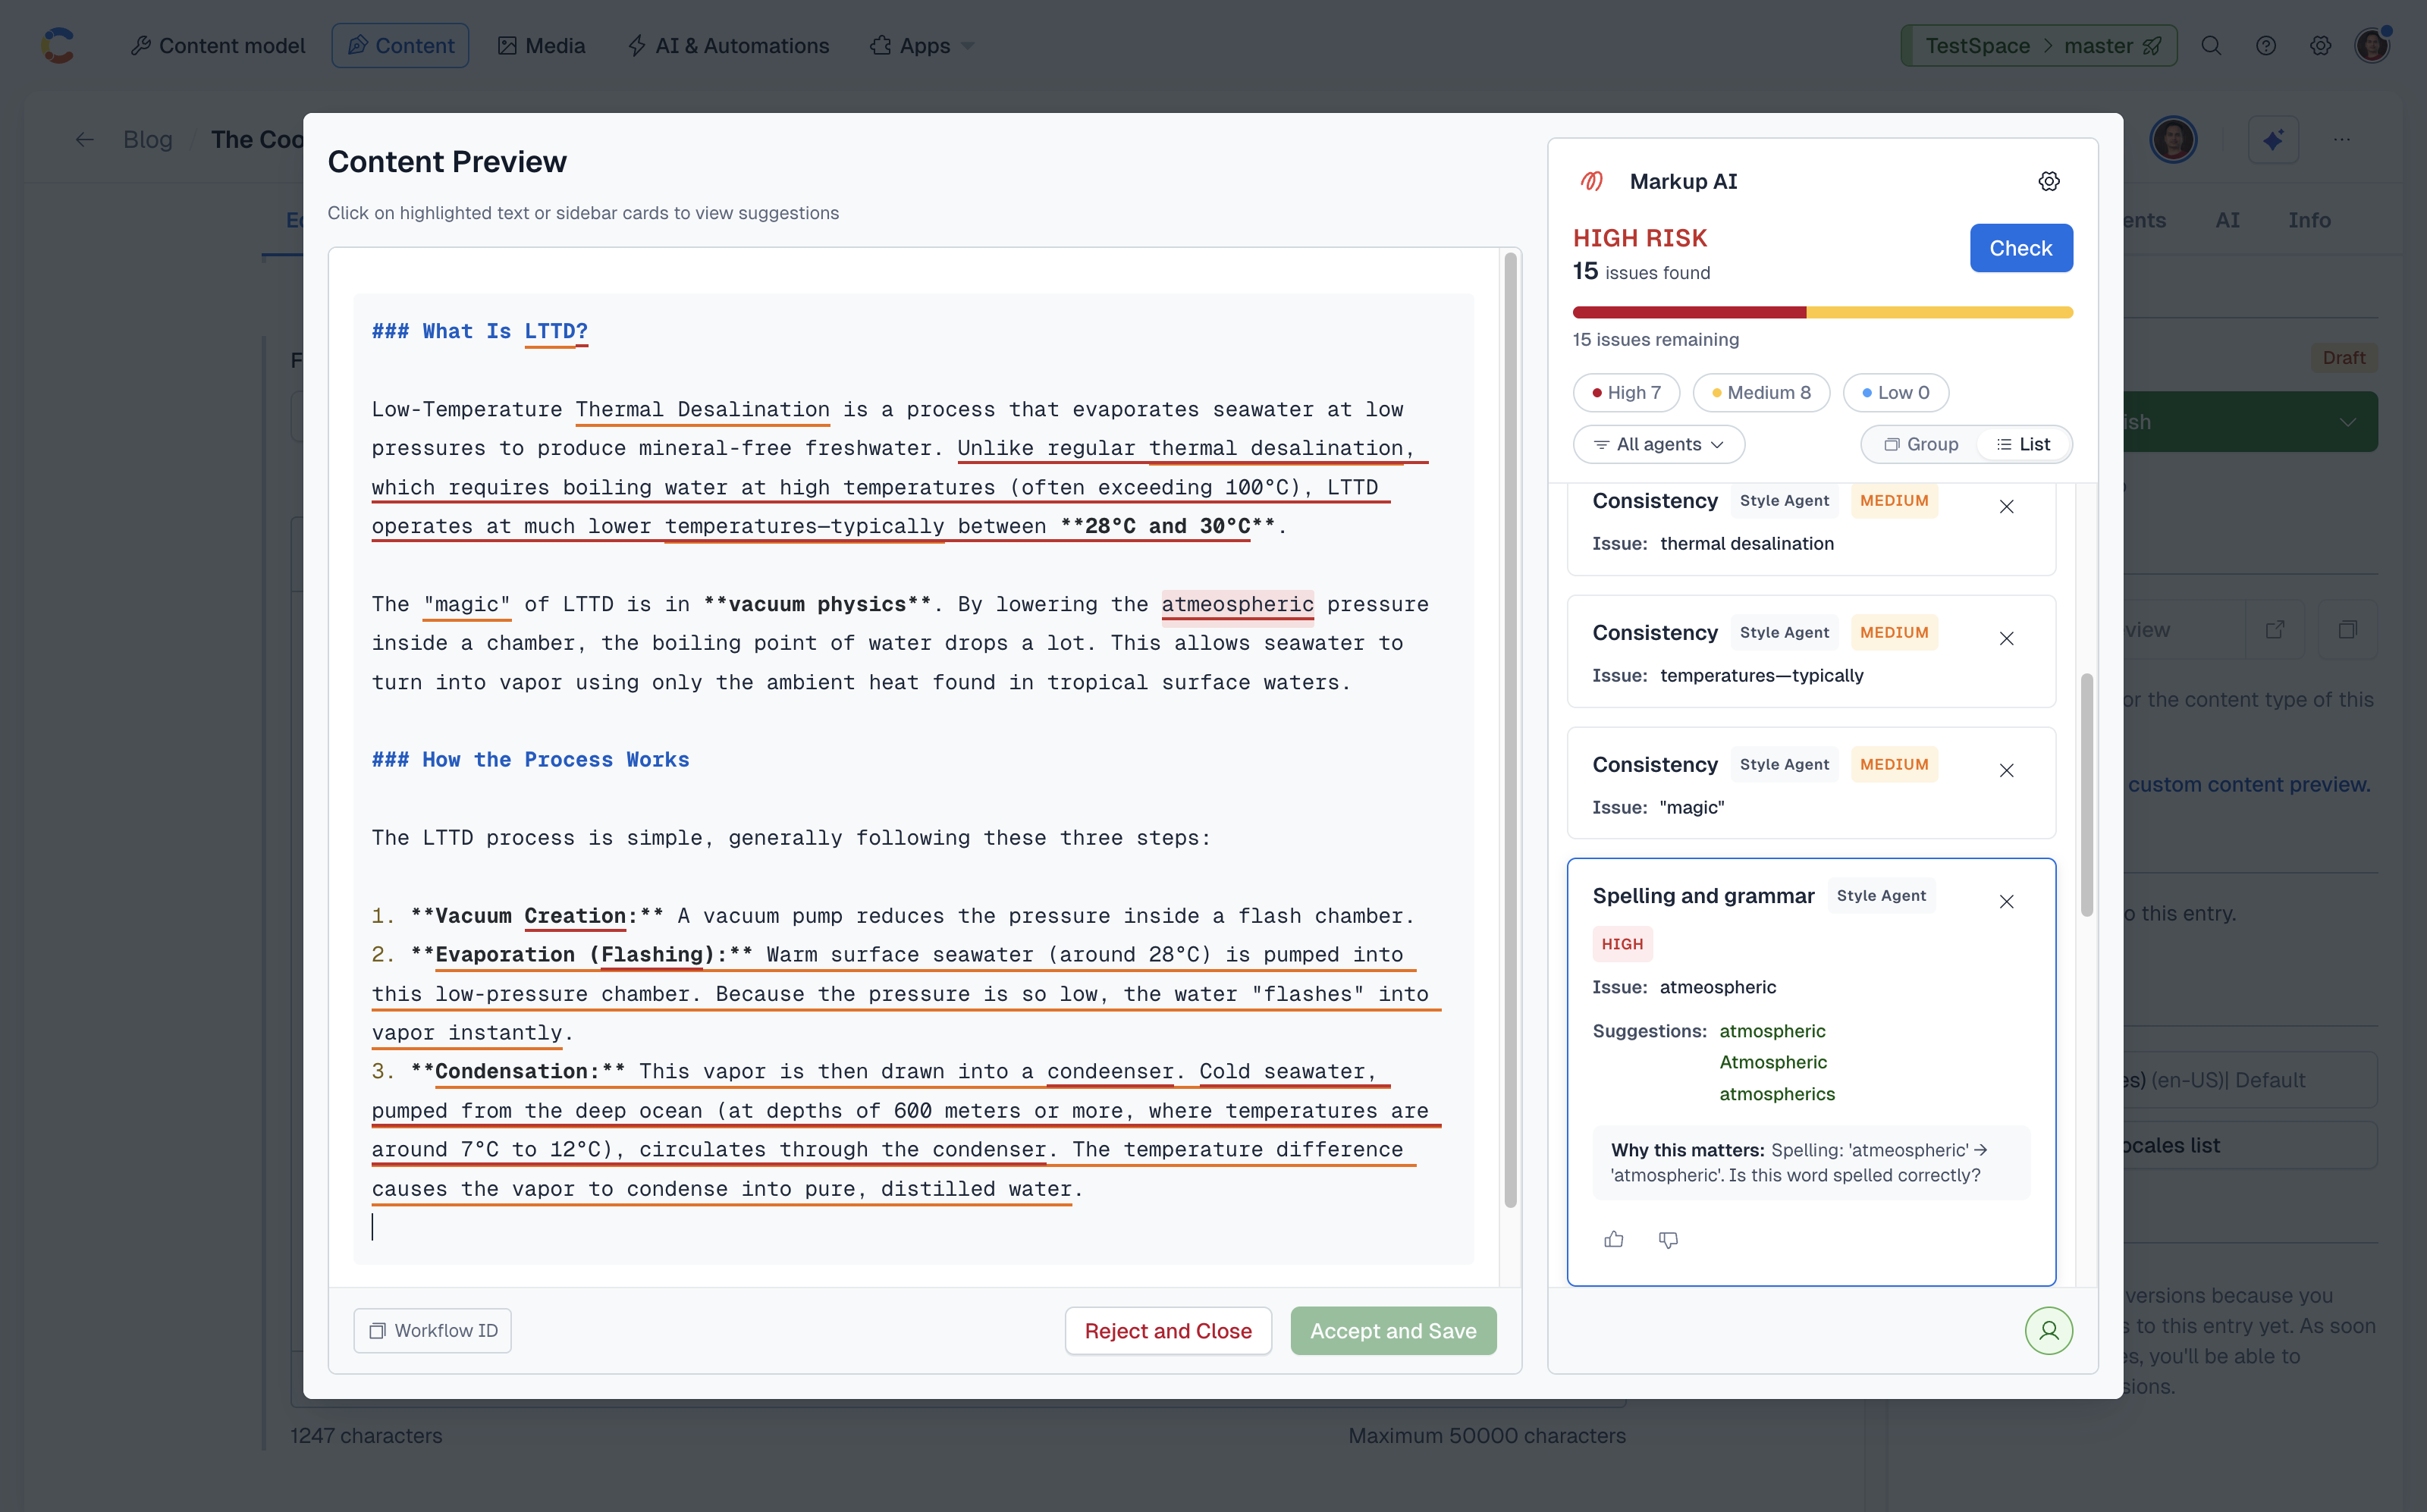
- Group / List — Toggle between List (a flat ordered list) and Group (issues grouped by agent and category).
Working through an issue card
- Click anywhere on an issue card to expand it. Only one card is expanded at a time — opening another card replaces the current one.
- An expanded card reveals:
- The category label (e.g. Spelling and grammar, Consistency, Clarity) and the severity tag (HIGH / MEDIUM / LOW).
- The issue text — the exact phrase Markup AI flagged.
- One or more Suggestions under a Suggestions: label. Each suggestion is a click‑to‑apply chip.
- A Why this matters explanation of the rule.
- Decide what to do:
- Apply a fix — click a suggestion to apply it to the preview. If three or more replacements are offered, expand the list with Show more (+N).
- Apply to all occurrences — when the same Style Agent issue appears more than once, an Apply to all N occurrences checkbox appears on the card. Tick it and click the suggestion to replace every occurrence in one transaction.
- Dismiss — click the × on the card to remove the issue from the list when it doesn’t apply.
The progress bar at the top of the sidebar opens an audit trail popover when clicked, with per‑severity totals plus applied and dismissed counts for this run.
Saving back to the field
When you’re satisfied with the applied fixes, use the buttons at the bottom of the dialog:
- Accept and Save writes the updated content back to the entry field and closes the dialog. The button is only enabled once you’ve applied at least one change.
- Reject and Close discards the in‑dialog edits and closes — the underlying entry field is untouched.
Contentful’s own auto‑save then versions the change as you would expect for a manual edit. You can still Undo within Contentful if you change your mind.
Re-running checks and switching fields
- The score and issue list reflect the last check you ran on the current field. After editing the preview, click Check again to refresh.
- To check another field on the same entry, close the dialog and click Markup AI on that field. Each field opens its own scan — issue positions from the previous field don’t carry over.
- Agent selection and Style Guide settings persist across fields for the session.
Sharing a check with Markup AI support
Every check produces a unique workflow ID. To have Markup AI’s support team review a specific run (for example, to investigate an unexpected suggestion):
- Click Workflow ID in the bottom‑left of the dialog to copy the ID to your clipboard.
- Share the ID with Markup AI support along with a short description of what you saw.
FAQ
- Which field types are supported? Symbol (short text), Text (long text), and Rich Text. Enable them per content type from the Configure screen.
- Why don’t I see the Markup AI button on a field? That field hasn’t been enabled for Markup AI yet. Open Apps → Installed apps → Markup AI → Configure and check the field under its content type.
- Where do I change the Style Guide? From the Agent settings panel inside the dialog (gear icon). A default can also be set per content type from the Configure screen.
- Can I check just part of a field? No — checks always run against the full contents of the field you launched from.
- Does it edit my entry as I apply suggestions? No. Applied suggestions only affect the dialog’s preview until you click Accept and Save, at which point the updated text is written back to the field.
- Can I undo an applied suggestion? Yes — close the dialog with Reject and Close to discard everything, or use Contentful’s normal Undo after Accept and Save.
- How do I sign in or sign out? Use the user icon at the bottom‑right of the dialog sidebar to access your account, organization, and Sign Out.
Known limitations
- Field‑scoped: Each check runs against a single field, not the whole entry. Run a separate check on each field that needs review.
- Text only: Non‑text assets (images, references, embedded entries inside Rich Text) aren’t analyzed; Markup AI focuses on textual content.
- Markdown and Rich Text: Flagged offsets are mapped from the source format to the dialog’s preview surface. If you make heavy edits while reviewing, click Check again to realign the issue list with the current content.
- Long fields: Very long bodies take longer to score and stream. The dialog shows a progress state while results stream in.