
Set Up SSO
Single sign-on — including attribute mapping and SCIM provisioning — is available on the Enterprise plan. On other plans, members sign in with a social login or an email and password.
Single sign-on lets your team sign in to Markup AI with your identity provider (IdP). Setup is self-service: you exchange metadata with your IdP, then confirm how Markup AI reads group membership.
You can add more than one connection — for example SAML for your parent company and OIDC for an acquired subsidiary. Each connection has its own configuration.
What you need
- The Administrator role in your organization.
- Access to your IdP’s admin console (Okta, Microsoft Entra ID, Google Workspace, JumpCloud, ADFS, PingFederate, or any SAML 2.0 / OIDC provider).
Add a connection
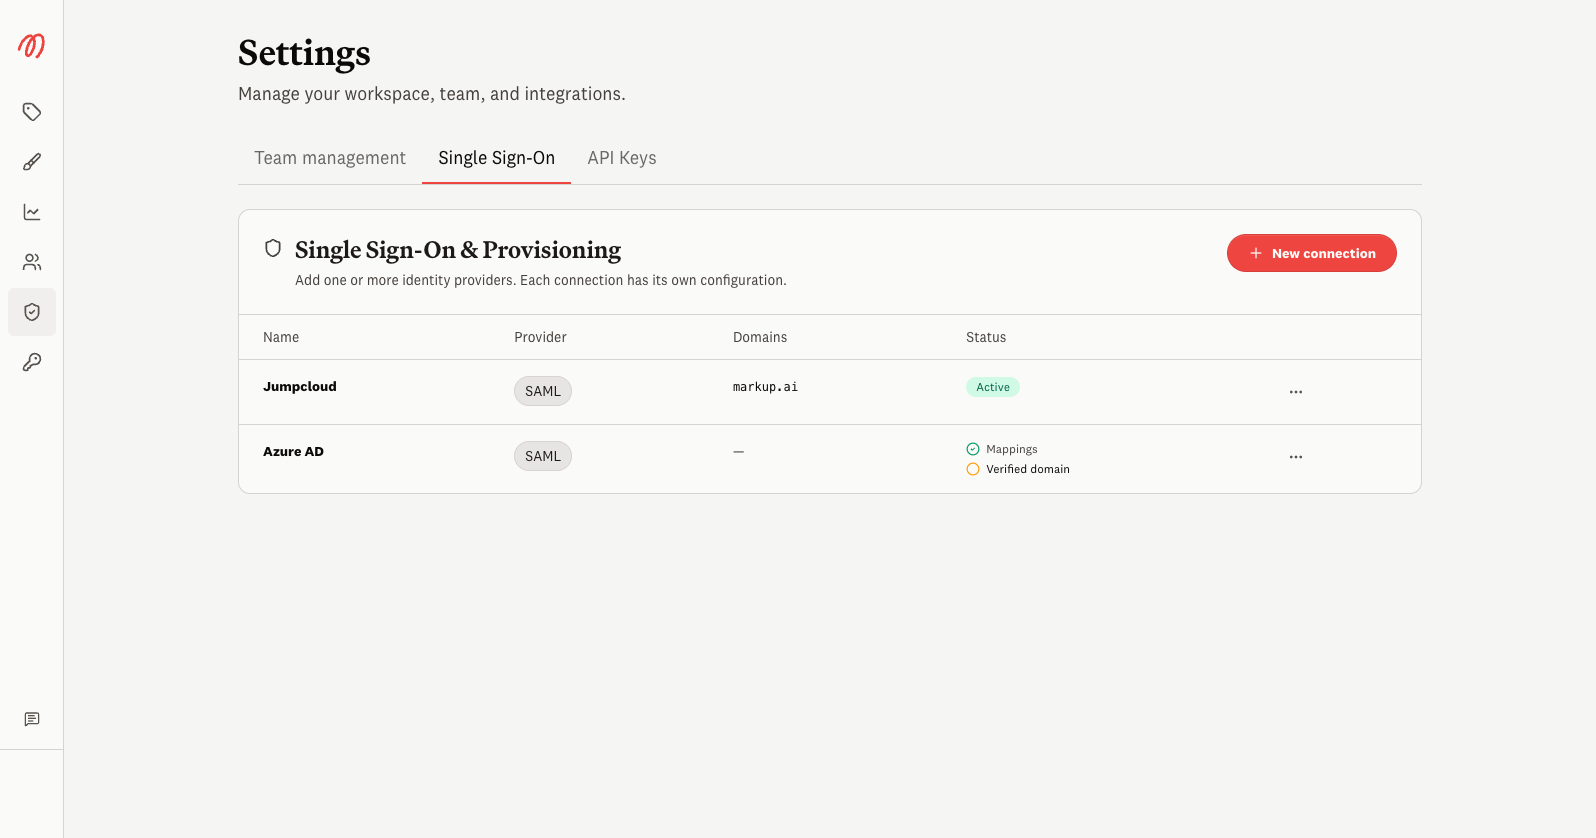
Open Single Sign-On settings
In the console, go to Single Sign-On. You’ll see any existing connections and their status.
Create the connection
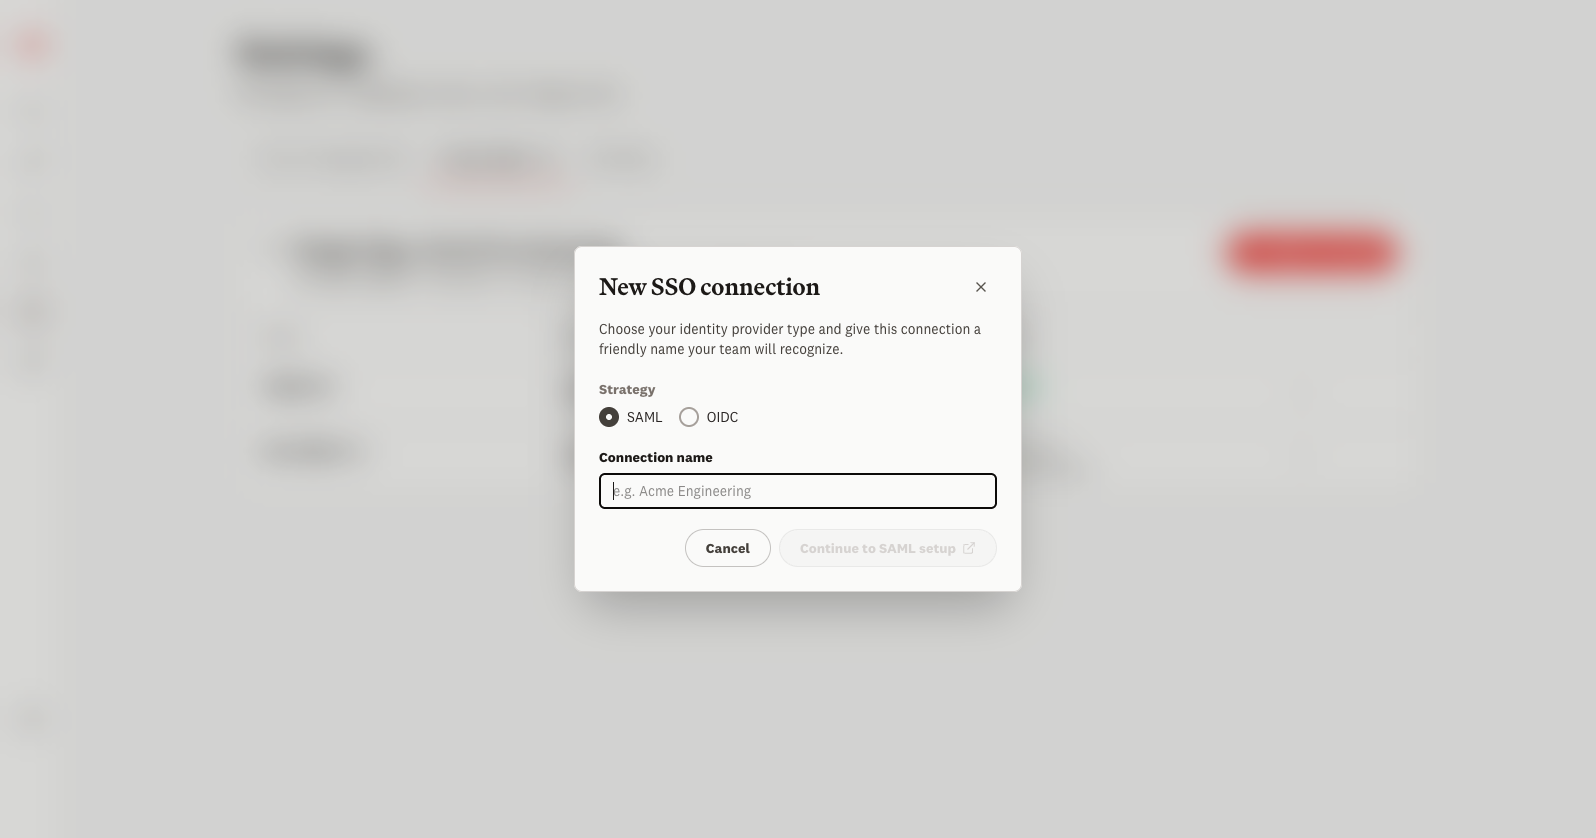
Select New connection, choose SAML or OIDC, and give it a friendly name your team will recognize. Select Continue to setup — the IdP setup form opens in a new browser tab.
Exchange metadata with your IdP
In the hosted form, pick your provider for step-by-step instructions. You’ll create an application in your IdP and exchange metadata — copy the Single Sign-On URL and Audience URI into your IdP, and provide your IdP’s metadata back. This step only configures the connection between your IdP and Markup AI; no user data changes yet.
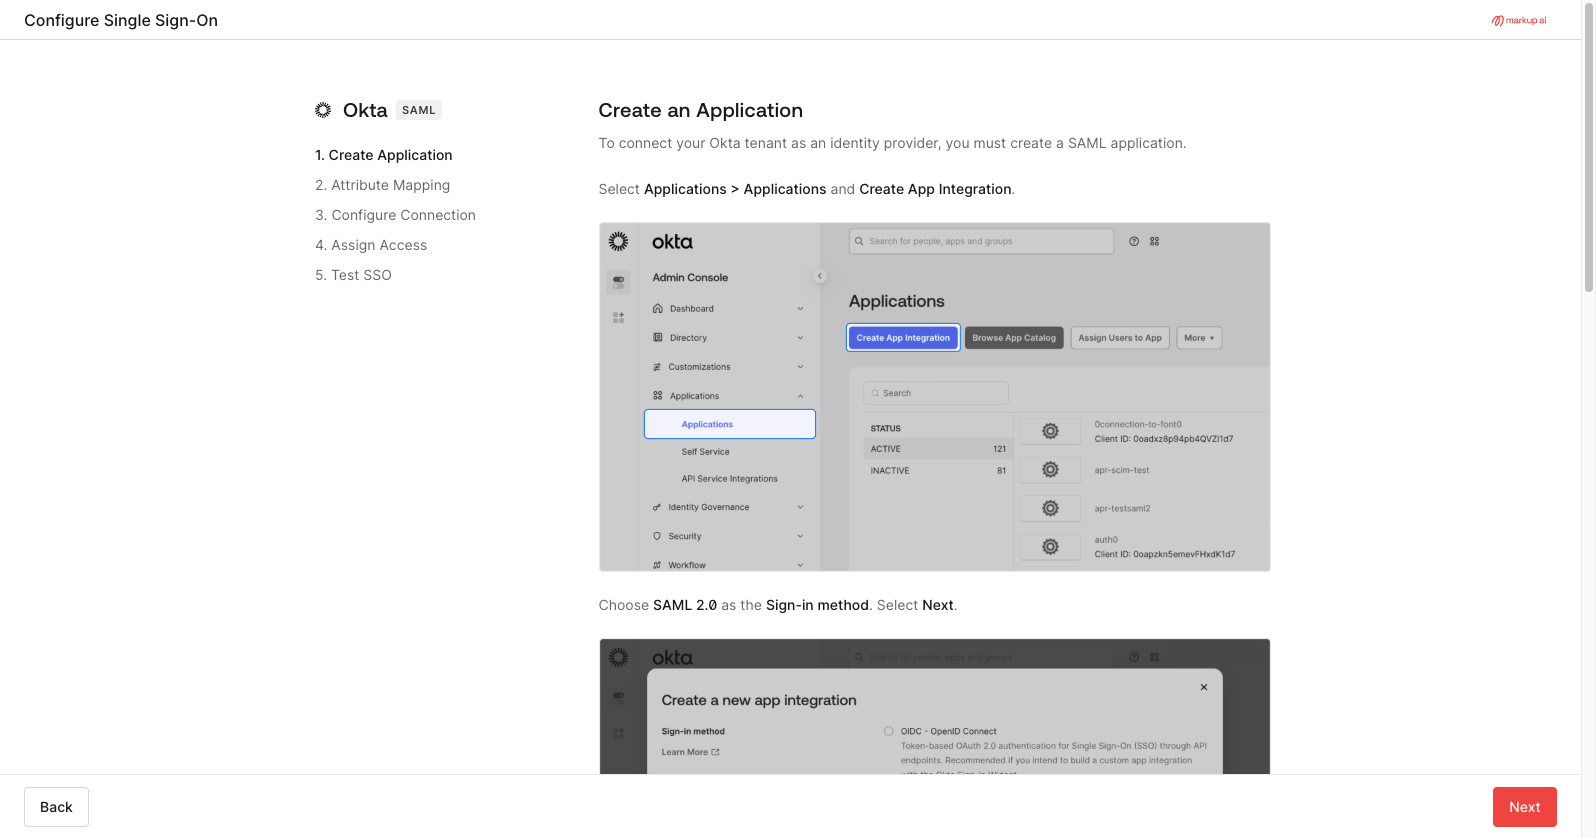
No provider listed? Choose Custom SAML (or OIDC) and enter the connection details by hand.
Set the sign-in domains
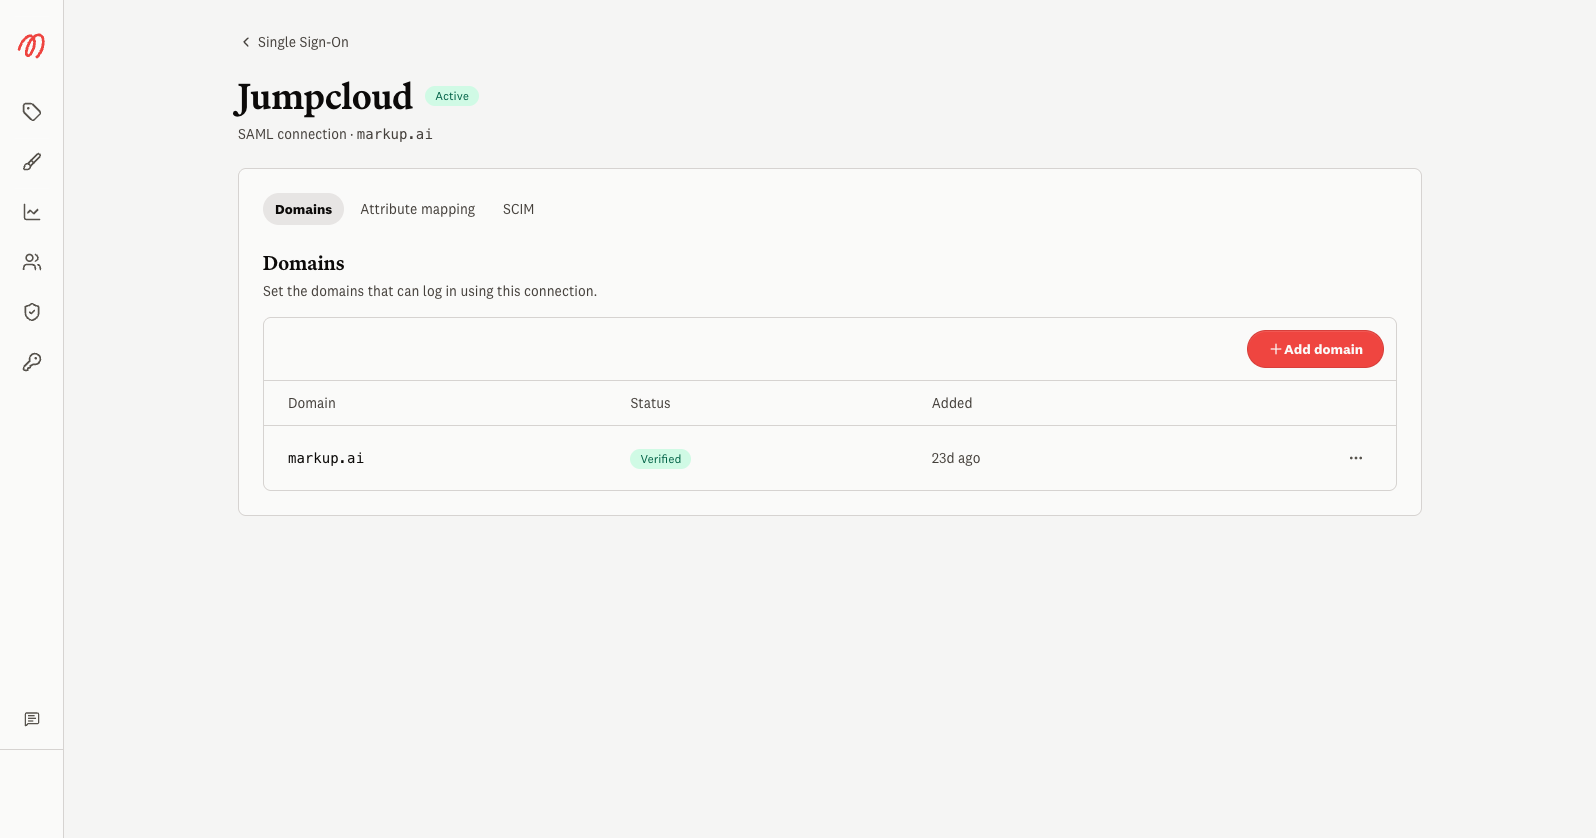
Back in the console, open the connection and add the email domains that should sign in through it on the Domains tab. Users with a matching domain are routed to this connection.
Map your groups
On the connection’s Attribute mapping tab, tell Markup AI which claim carries group membership and how to read it. This is what turns your IdP’s groups into Markup AI groups — see Attribute Mapping.
Editing a connection later
Open any connection from Single Sign-On to change its domains, attribute mapping, or SCIM settings. To re-run the IdP metadata exchange, use the connection’s Actions menu — it reopens the hosted setup form for the existing connection rather than creating a new one.